Friday, July 29, 2011

Easy How-To Make Glass And Paper Jewelry Using A Bail Or Pendant Blank

I recently added more items to the Jewelry Making Supplies Page


When the new glass shapes and blank pendants arrived I tested out the pendant making process. This is super quick and easy!


Here's a little tutorial on making pendants with paper and glass:

1) Apply a generous layer of clear glue (I used Glossy Accents) to the flat side of your glass piece. Lay it gently down onto your paper artwork (scrapbooking paper, rubber stamp art, prints, drawings etc.) Allow to dry.


2) Cut around the edges of your artwork. Use a file to sand down any areas that are too close to the edge to cut with scissors.
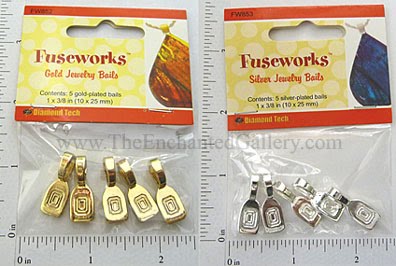


3) Hanging options: You could wrap the edges with copper tape and solder around it. You could seal the back of the paper with your clear glue or spray sealer, then add a pendant bail on it for hanging. Or you could glue it into a pendant blank as I have done here:


I plan on experimenting with soldering jewelry using glass and rubber stamped art soon. I'll post a tutorial as soon as I do :)

Thursday, July 21, 2011

Rubber Stamping On Wood - Charms Pendants & Magnets

It's almost back to school time again! Time has been flying by so fast. Here are some rubber stamped wood charms I have made using Stazon ink and markers. I use a small drill bit in my dremel to make the holes and attach a jump ring for hanging.

Alphabet learning charms using 1" circle shape wood:


Back side:


Tree pendant 1.5":


I will be stocking various wood shapes for jewelry and magnet making soon, but for now you can find these at your local Michaels craft store. The wood shapes are Lara's Crafts brand from The New Image Group.

Heart shape wood with magnet back:


Here I used Lumiere metallic acrylic paint to cover the wood surface. I then rubber stamped my image using Stazon black ink. Apply your choice of sealer, here I have used Glossy Accents (for fridge magnets) but you could use a clear acrylic spray coat, resin or epoxy sealer for jewelry items.


This one is coated with a clear glitter paint as a sealer:


I am working on a TON of new rubber stamp designs and will be blogging about the new releases soon :)

Wednesday, February 23, 2011

Vintage Mermaid Fairytale Story Book Rubber Stamps

One of the four new rubber stamp sheets that have recently been added to The Enchanted Gallery!


Example art using these rubber stamps and Copic markers for coloring:


Tuesday, February 08, 2011

Kitty Cat Rubber Stamps Fairy Mermaid Angel Kittens

One of the four new rubber stamp sheets that have recently been added to The Enchanted Gallery!


I made the following cards using these rubber stamps along with paper by K&Company, Punch Bunch and EKSuccess/Martha Stewart paper punches, Nestabilities Die Cuts, Copic markers, Stickles glitter glue.


Domino (1"x2") size game pieces rubber stamped with Stazon Black ink pad, sealed with Mod Podge, colored with Copic markers:


Stazon black over Alcohol Inks:


:)

Tuesday, February 01, 2011

Classy Vintage Flower Fairy Dress Lady Rubber Stamps, Domino Art and Greeting Cards.

One of the four new rubber stamp sheets that have recently been added to The Enchanted Gallery!


Here's some example art I made using these rubber stamps:


I have used Copic markers for coloring, Paper by K&Co., Flower paper punch by McGill, Fern punch from Punch Bunch, Border punches by Ek Success, Black Stickles glitter glue, Spellbinders Nestabilities Die Cut Labels Four.


Monday, January 31, 2011

Hello Kitty Cuckoo Clock - MDF Kit by KaiserCraft

I was looking at new goodies that came in at my local scrapbooking store, and this cuckoo clock kit from KaiserCraft caught my eye.


I've always wanted a cuckoo clock, but boy are those things expensive. Every once in a while super cute and girly things catch my eye (ie. pink/glitter/kittens) and I remembered I had these little Hello Kitty toy figurines I collected ages ago...


And Hello Kitty as a mermaid (Yay! Mermaids and cats - a Mercat?)


I used some scrapbooking paper by BasicGrey attached with mod podge, decorated the edges with glitter glue, added a little wood tray for the mer-cat to sit, and some necklace chain to hang the dangly parts. Here's my finished clock:


More ideas on how to decorate your cuckoo clock kit over at the
Kaisercraft blog.