Showing posts with label Jewelry Making. Show all posts

Monday, November 17, 2014

The Enchanted Gallery Regularly Updates at Pinterest!

The Enchanted Gallery is now regularly updating all new photographs added within the many pages of www.TheEnchantedGallery.com at one convenient place - PINTEREST!

If you're new to Pinterest, basically it is a picture board website where you can "pin" (post) photos you find around the internet onto easily organizable "boards" (custom categories.) It also allows you to see what new items have been added to a website you want to follow. Since this blog requires a lot more time and effort to make posts about new content, I have decided to put the bulk of my efforts into Pinterest for website updates.

You can follow all of my boards to be notified of everything I update, including all new products, tutorials, photography, artwork and craft project inspiration from my favorite websites. You can also follow/subscribe to specific "boards" (themed folders of images) for just the things you want to see. For example, alcohol ink projects OR jewelry making supplies and pendant trays OR new rubber stamp sheets. Unlike this blog, you can choose to follow only the types of projects that are within your interest, or you can follow them all to see every new product and tutorial as soon as it comes out.

Here's an idea of what the Pinterest website looks like:

I may still periodically post here in the future, but Pinterest will be much more active since it allows me to instantly place an image onto my boards as soon as it is uploaded to my website. For the most current look at what is new at The Enchanted Gallery, I invite you to come visit me at http://www.pinterest.com/kimberlycrick/

Thank you :)

Kimberly Crick

Thursday, July 03, 2014

Quick and easy faux dichroic glass tutorial using rubber stamps

The "other things to do with domino size rubber stamps" tutorial page has received an update!

View the full free tutorial, step-by-step imitation dichroic glass jewelry tips and tricks here.

Since traditional dichroic glass involves heating glass to fuse it with reflective metallic particles, it is not something you can make easily at home with no special equipment. I've always liked the look of these glass pieces and here's my super simple DIY way to mimic it!

Using Stazon Jet Black ink pad, rubber stamp the back of a glass piece (here I used an insert for pendant trays) you can also use this technique on any transparent flat bead, acetate/film transparency, plastic food container packaging etc. Color over the stamped image with glitter glue or acrylic paints.

A substantial amount of updates have been happening site-wide including tutorials, a new section for game tiles/flat beads to rubber stamp or draw on, many new products in each category including several new designs of blank pendant trays in the jewelry making section. I will work on blog posting about each section's updates soon :)

Tuesday, January 14, 2014

New Mini Domino Rubber Stamps, Nature Set, Pendant Trays, Site Update.

Now that the holidays are over I have time to dust off the ol' blog and post some updates :)

Here are some of the things recently added to The Enchanted Gallery.

New scenic rubber stamp set -

Miniature domino size stamp sets for tiny jewelry projects such as earrings and bracelets -

New jewelry making supplies -

I hope everyone had a wonderful holiday season and now that things are calmer I'll try to get all the new tutorials and artwork that I've been working on posted asap!

Sunday, June 16, 2013

Media Mixage Bezel Pendant Trays by Spellbinders and Ice Resin by Susan Lenart Kazmer

I was very happy to see the new "Media Mixage" line by Spellbinders that recently came out. The deep pendant trays are perfect for polymer clay, resin and multi-layer collage that uses items such as charms, glitter, gold leaf, photographs and more. I've decided to add some of these new pendant trays to The Enchanted Gallery's jewelry making supplies page.

This and other media mixage projects can be found on the Spellbinders blog-

These trays work wonderfully with "Ice Resin" by Susan Lenart Kazmer. You may also be interested in the Ice Resin mixed media artwork and jewelry projects blog.

I'm happy to see more products on the market that allow me to create unique jewelry easier. I'm excited to start experimenting with these bezels and resin with my polymer clay projects.

Thursday, June 13, 2013

New Glass Domes for Terrarium Craft Jewelry and Floral Theme Beads

Many new items have been added to the terrarium craft and floral theme section including glass domes:

and a variety of acrylic flower and leaf beads, tree charms and bead caps:

More site update announcements coming shortly :)

Sunday, February 17, 2013

Miniature Domino Game Tiles and Drilling Options

I have gotten a lot of questions about drilling options for domino jewelry, and also if I carry miniature dominoes and rubber stamps. I'm happy to announce that I have started carrying miniature domino sets and have plans to make coordinating mini rubber stamps very soon. The new rubber stamp sets will be sized for these 16mm x 30mm mini dominoes. This size is also great for stamping on beads, earrings, small polymer clay charms etc. Miniature domino size varies based on the manufacturer, I have seen them as small as 1/2" x 1" (about 12 x 25mm.) I have decided on 16mm x 30mm (a few mm larger than some other manufacturers) so that the new rubber stamps should always cover the entire surface of the mini domino instead of potentially being too small. There should be minimal image loss from cropping if you still decide to use smaller dominoes from another manufacturer.

These mini domino game pieces are made from the same quality white resin as the full size tiles without the dipped surface impression for the color dots. The glazed-on color can be lightly sanded if desired to create a flat, ready to decorate surface on both sides. They are small and light weight enough to be used for earrings and bracelets.

I use a handheld Dremel tool for drilling holes in my domino art. Some of the tutorial covered drilling holes through your domino and using wire, but another way to hang a domino is by using screw eyes placed into a pilot hole. This way you can use a jump ring to hang it from your cord, ball chain or earring components. Full instructions have been added to the bottom of the domino tutorial page.

Until the new mini rubber stamp designs arrive, I've been playing with the standard 1" x 2" rubber stamps. Here's an example of using one of the standard size domino stamps to create a pendant, then again using part of the image on the miniature dominoes for matching earrings.

I am also working on new plain shape clay molds, posting metal alphabet stamps and rub'n'buff paints for the polymer clay page. It should not be much longer for a rubber stamping in polymer clay tutorial as well :)

Thursday, February 07, 2013

Jewelry Making Supplies Page Update

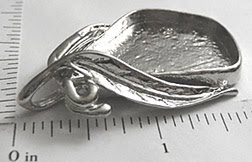
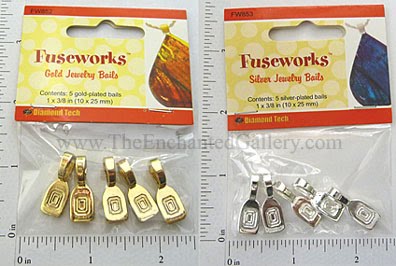
Many new items have been added to the jewelry making supplies page this week including inexpensive glue-on jewelry bails, new pendant trays, charms and more.
New tutorials and other products are in the works. Thanks for stopping by :)

Saturday, July 28, 2012

Easy to Make Polymer Clay Pendants Using Jewelry Blanks and Perfect Pearls

I have added this quick and easy project to the how to use polymer clay push molds tutorial page :)
Once you have pressed your clay into your mold for an impression, take a blank pendant tray and press it gently down onto your clay to create an outline. Cut out using an x-acto knife/razor blade.
Gently place the clay into your pendant, making sure it fits well. This is a good time to apply a finish such as perfect pearls, a metallic pigment powder that sticks to the raw clay.
Then bake the clay while it sits in your metal pendant. Once it has cooled down, remove the clay from the pendant tray.
Seal with your choice of sealer (Polycrylic clear gloss is my favorite, found in a spray can at most hardware stores near the wood sealers and stains.) Glue it back in place with a strong adhesive rated for plastic to metal adhesion (I use E-6000.)
I have also expanded the colors of Perfect Pearls in stock at The Enchanted Gallery's clay and related supplies page :)
Many small additions have been made around the site and I'll be posting new tutorials asap.

Friday, July 29, 2011

Easy How-To Make Glass And Paper Jewelry Using A Bail Or Pendant Blank

I recently added more items to the Jewelry Making Supplies Page


When the new glass shapes and blank pendants arrived I tested out the pendant making process. This is super quick and easy!


Here's a little tutorial on making pendants with paper and glass:

1) Apply a generous layer of clear glue (I used Glossy Accents) to the flat side of your glass piece. Lay it gently down onto your paper artwork (scrapbooking paper, rubber stamp art, prints, drawings etc.) Allow to dry.


2) Cut around the edges of your artwork. Use a file to sand down any areas that are too close to the edge to cut with scissors.


3) Hanging options: You could wrap the edges with copper tape and solder around it. You could seal the back of the paper with your clear glue or spray sealer, then add a pendant bail on it for hanging. Or you could glue it into a pendant blank as I have done here:


I plan on experimenting with soldering jewelry using glass and rubber stamped art soon. I'll post a tutorial as soon as I do :)